

Issue warranties
Set up warranty profiles so ShopWrk issues a warranty when you complete a job.
A warranty is the coverage a customer has on work you did, such as 10 years on a full-front PPF install. You set up a warranty profile for each film or product, attach it to the services that use it, and ShopWrk issues the warranty when the job is completed.
Changing settings needs Edit settings, which Owners and Admins have. The Warranties page needs View all jobs, and voiding a warranty or filing a claim needs Edit jobs. Technicians have neither by default.
Turn warranties on
Go to Settings > Warranties and turn on Warranties. It's off for every shop until you do, and while it's off, completing a job issues nothing.
Create a profile
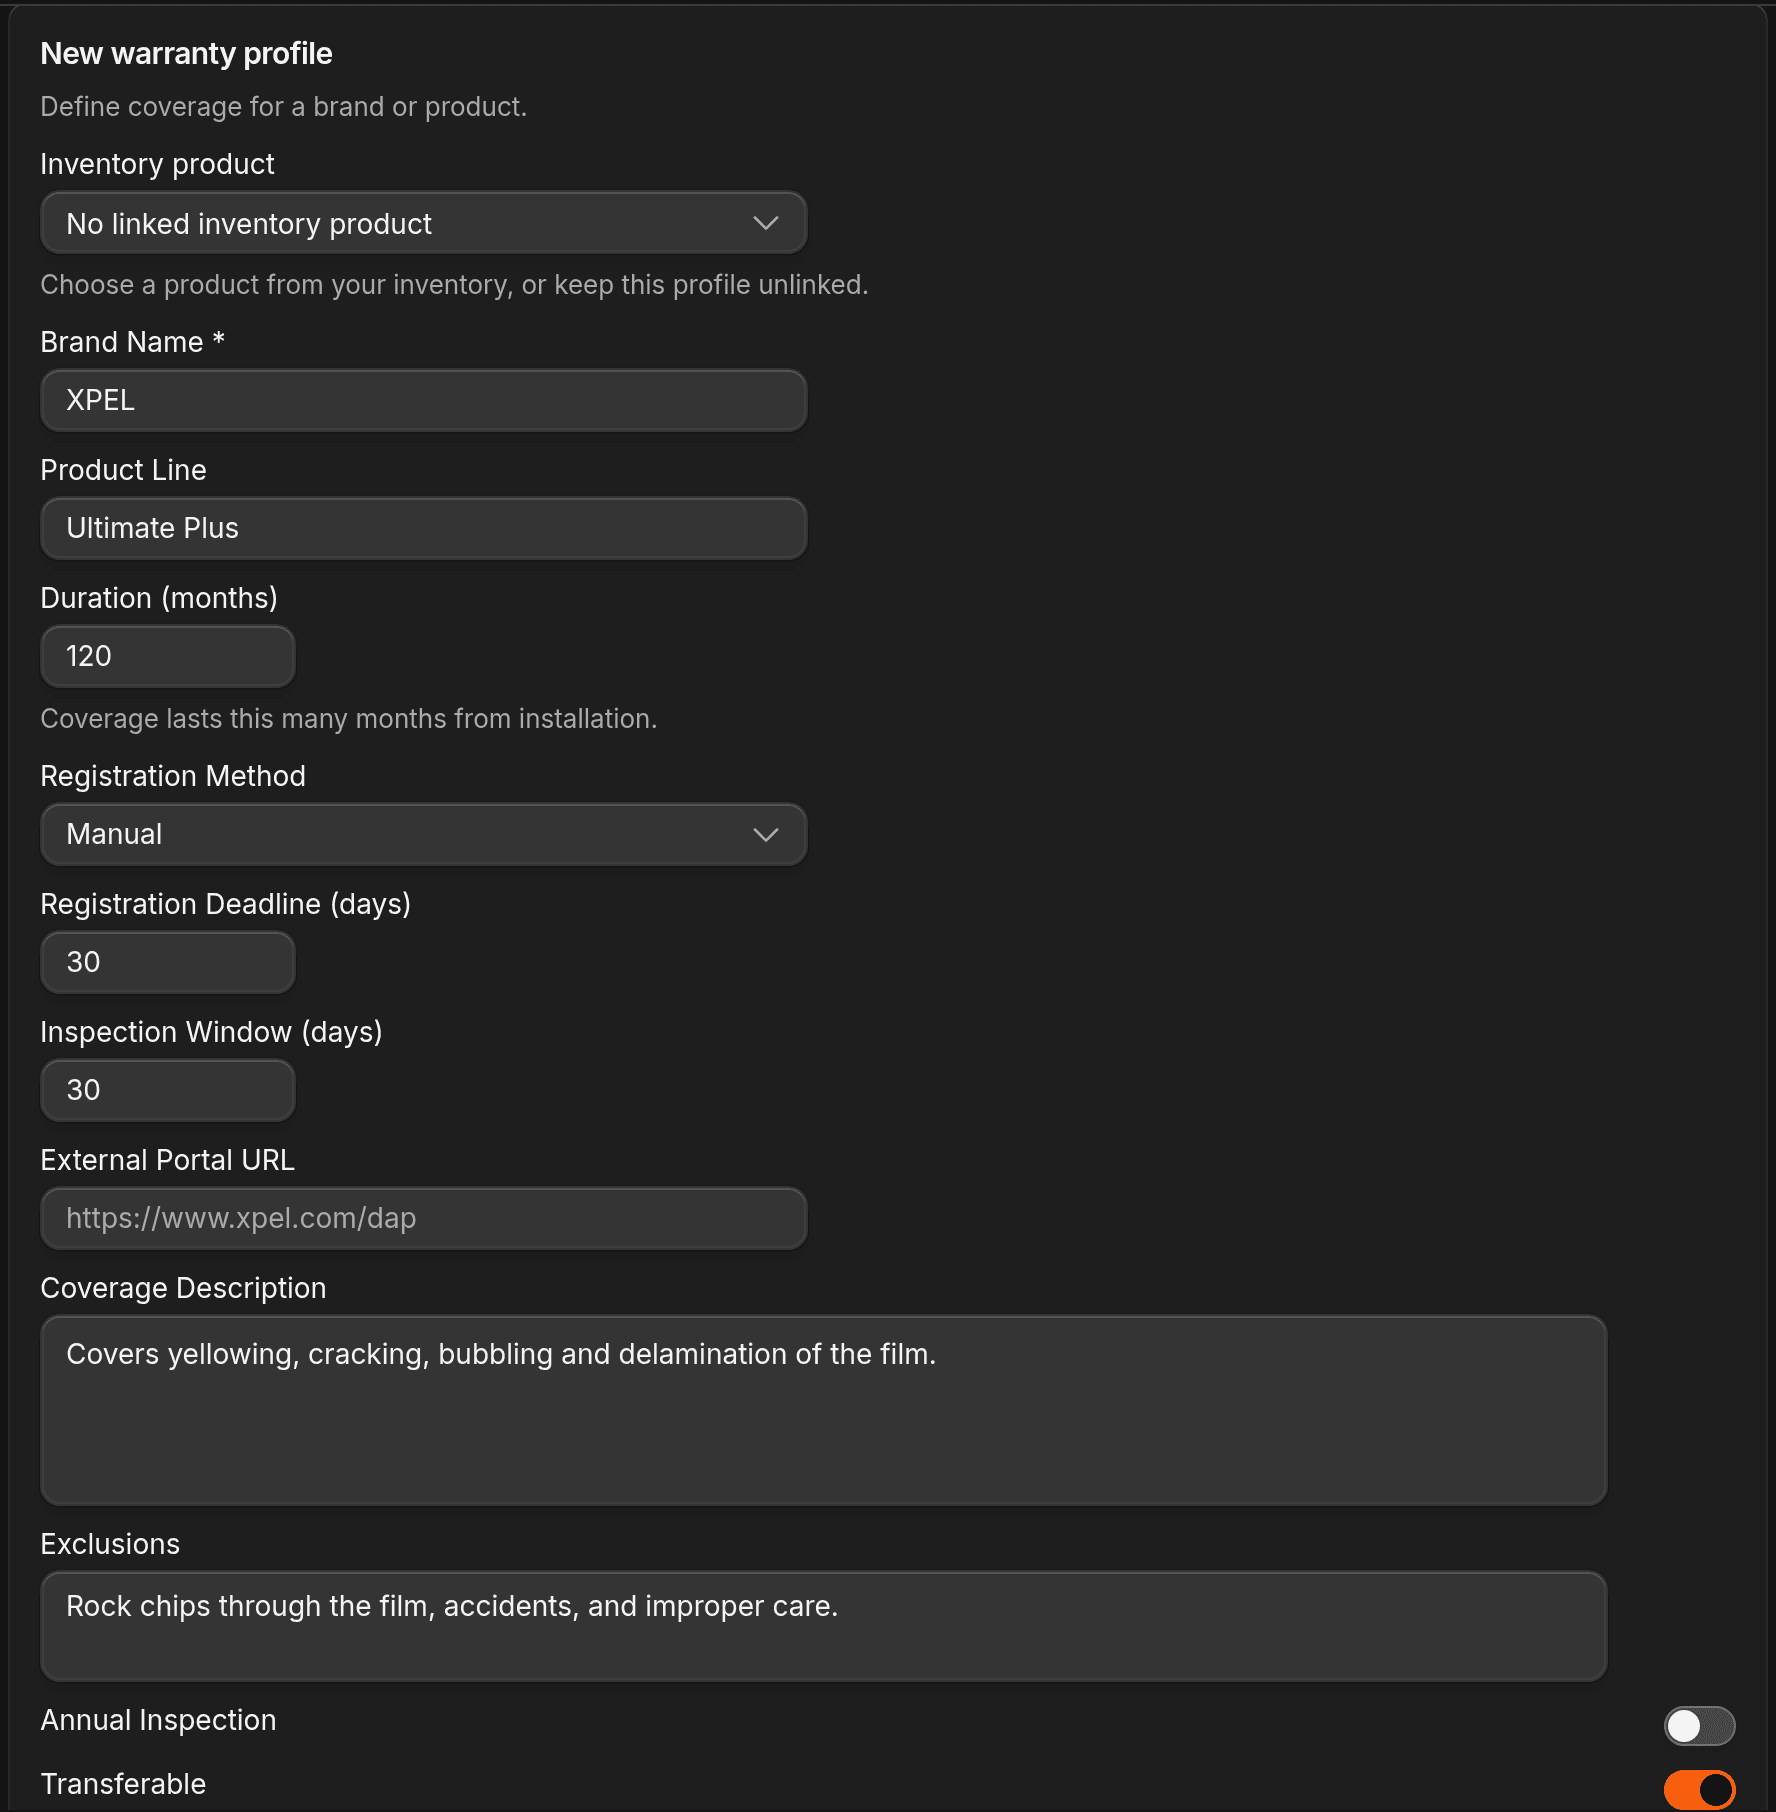
Click Create New Profile. Enter the Brand Name, the Product Line, and the Duration (months). Coverage runs that many months from the install date. A duration of 360 months or more shows as Lifetime.
Add the Coverage Description and Exclusions, and turn on Transferable or Annual Inspection if the warranty has those terms. If the manufacturer wants the install registered, set the Registration Method, the Registration Deadline (days), and the External Portal URL. Click Save at the top of the page.
If you'd rather start from examples, click See Default Profiles.
Attach it to a service
Open the service, turn on Enable warranty under Warranty, and pick the Warranty profile. Only active profiles appear.
Complete the job
When a job is completed, ShopWrk issues one warranty for each service on it that has a profile. If a service has no profile but one of its panels does, the panel gets the warranty instead. Open Warranties in the sidebar to see them.
The install date is the date the job was completed. The profile's terms are copied onto the warranty at that moment. If you edit the profile later, warranties already issued keep their old terms.
ShopWrk issues warranties when the job is completed, and there's no button for adding one by hand. Jobs you completed before turning this on don't get one.
Find a warranty
On Warranties, search, or filter by Status (Pending, Registered, Overdue, Expired, Voided) or Brand. Click a row, or View Details in its menu, to see the customer, vehicle, job, product, and dates.
A new warranty starts as Pending Registration. If the manufacturer needs the install registered, do that, using Open Portal if you added an External Portal URL. Then click Mark as Registered. You can enter a Manufacturer Reference ID first.
What the customer gets
ShopWrk doesn't send the customer anything when it issues a warranty. They see it in their Client Portal, under Warranties and on the vehicle's page. It opens as a Warranty Certificate PDF with your shop's details, the vehicle, the coverage, and the exclusions. You can download the same PDF with Download PDF from the list or the warranty's details.
File a claim
Open the warranty and click File Claim. Choose Manufacturer (product defect) or Labor (workmanship), describe the problem, and click Submit claim. Move the claim along with Review, Approve, Deny, and Mark Completed. Each step lets you add resolution notes.
Void a warranty
In the list, open the row's menu, click Void Warranty, and enter a Reason. You can't undo it, and the coverage stops.
Change or remove a profile
Use the edit button on a profile's row to change it. Deactivate stops a profile from issuing warranties, including on services that still use it. A profile that has issued warranties can't be deleted, so deactivate it instead.